Much like any other vehicle, motorcycles, scooters, and mopeds will require regular maintenance to keep things running smoothly and efficiently.
Doing those small DIY Maintenance tasks can also save you a little bit of money and keep you safe from any issues or malfunctions that could occur...
Disclaimer:
It goes without saying that not all bikes are the same across the board, so please refer to your owner's manual and educate yourself on things such as the location of filters and plugs, the correct fluids and their amounts, and torque specifications for reinstalling nuts and bolts.
Always make sure to be knowledgeable and competent in maintenance tasks before carrying them out, or if you are in any doubt consult your mechanic or owner’s manual for precise information concerning your specific model.
With that being said, in this blog we are going to be running down everything you need to know regarding the small DIY maintenance tasks you can carry out at home on your motorcycle.
So without further ado - let's get into it...
How often should maintenance be done on a motorcycle?
When it comes to servicing, unfortunately, there is no right answer as to how often you should be getting your motorcycle serviced, it all depends on the model in particular and the service intervals chosen by the manufacturers - thankfully this information can be easily found in your owner’s manual!
However, a general rule is that you should be servicing your motorcycle every 6 months or 4000 miles including getting your oil changed, lubing, and adjusting the chain. It is also advisable that you check your tyre pressure at least once a month and flush the cooling system on water-cooled engines every two years - but as I say it is always best to follow manufacturers' recommendations for your particular model.
We would also recommend doing regular ‘walkaround’ visual checks while your bike is warming up, looking out for leaks, chain tension, chain lubrication, tyre condition, all your lights/headlights indicators are working, and checking your brake and clutch lever before starting your journey.
The benefits of doing DIY motorcycle maintenance
There are many benefits to keeping on top of your motorcycle maintenance, such as:
- Help make your motorbike last longer.
- Reduces repair expenses.
- If regular maintenance is carried out, it can also help to reduce the risk of a mechanical failure causing an incident or accident.
- In general, makes your riding experience smoother and potentially less stressful
What regular maintenance is important to carry out?

Motorcycles and scooters, much like any other vehicle you own, will require regular maintenance jobs to keep them in tip-top condition.
There are a few checks that you can do from the comfort of your own home, in a few simple steps providing you take your time:
- Checking your tyres
- Adjusting your motorcycle chain
- Changing your motorbike oil and filters
- Brake Maintenance
- Replacing your sparkplugs
- Checking if your forks are bent
- Checking your battery
However, this being said if your motorbike has damage that you cannot fix yourself, we do advise that you to take it to a professional.
Motorcycle Maintenance: Tyres
Checking your tyres is by far one of the easiest and most essential maintenance tasks you should be carrying out. Having the correct amount of pressure and tread on your tyres can really help your motorcycle run smoothly. To be on the safe side (as we mentioned previously), aim to carry out these checks at least once a month.

How to check your motorcycle tyre pressure:
To check your tyre pressure, you will need to locate the valve stem (typically on the inside of the wheel) and attach an air pressure gauge system. You can then compare this against the recommended pressure located on the sidewall of your tyre.
You may already have a foot pump or even an electric air pump, but if not and you need to put some air in your tyres, many petrol station in the UK will have a machine that you can fill up at. If you slightly overinflate your tyres, you can just let some out and replace the valve stem cap when done.
How to check your motorcycle tyre tread:
If you need to take a look at the tread, you will need to check the tyres wear indicator (this is a little rubber knob that resides in the groves of the tyre).
If this knob is at the same level as the rubber that meets the road, it is time for a tyre replacement. This will be one for the professionals!
You can also pick up a handy little motorcycle tyre tread gauge as well as an alternative way to measure your tread.
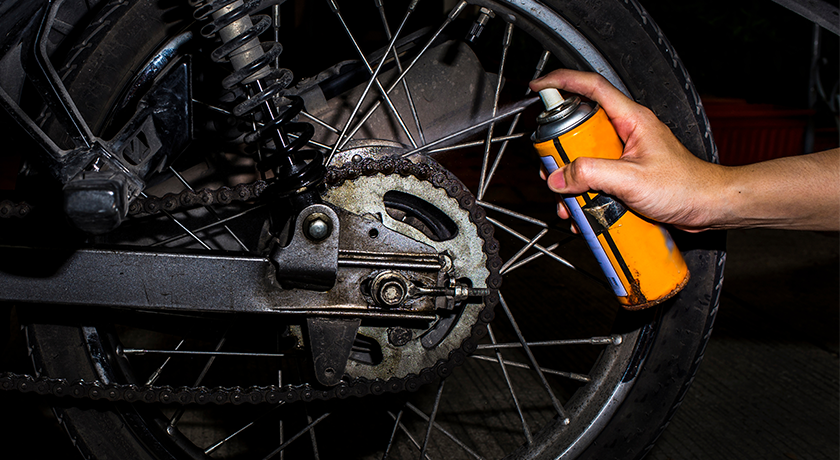
Motorcycle Maintenance: Adjusting and Checking your Chain
Checking your motorcycle chain is another maintenance job you should really be carrying out regularly, and it is easy enough to do from the comfort of your home.
When it comes to motorbike chains, most bikes across the board will be the same (but do double-check for your particular model), so learning how to adjust it should be an easy enough task:

What to do if my motorcycle chain is too tight?
If your motorcycle chain is too tight, it will put stress on several parts of the bike - especially the sprockets. This can cause the sprockets to wear faster and make the engine work a lot harder than it needs to be - resulting in the suspension feeling abrupt or uncomfortable.
What to do if my motorcycle chain is too loose?
If your motorcycle chain is too loose it will move around, and in worst-case scenarios even jump off the sprocket, get tangled, or throw you off the bike.
How to adjust a motorcycle chain:
Step 1:
Take a look in your owner's manual and find out what the slack of your chain should be. Once you know this, keep a note of it somewhere and then you can begin.
Step 2:
Next, you’ll need to get it up on either its centre stand (if it has one) if not then you’ll need a paddock stand. For a paddock stand this is where your handy spare pair of hands can come into play. Find the swingarms and line them up with the rubber grips on the stand, then push down on the lever to elevate your bike.
Step 3:
Once your bike is up in the air, you can begin to inspect the area you plan to work on. Give the chain a once over and give the wheel a spin to check for any sticking.
Step 4:
With your motorbikes rear wheel off the ground, you can now loosen the axle nut and adjusters (remembering to loosen it the same amount on each side). Once the chain is slack, tighten the axle and adjusters back up so there is a minimal amount of resistance.
Step 5:
Hold a ruler up against the chain and begin to move it up and down to test how much your chain moves, do not force it. After you have found to correct tension for your chain, it is time to check your wheel alignment.
Step 6:
When looking at the wheel alignment, most bikes will have marks on their swingarm to help you out - however, these do tend to be inaccurate. Instead, you can measure from the centre of the axle to a fixed point on the swingarm, and if they are both equal, it should mean that your rear wheel is correctly aligned.
Step 7:
Before tightening everything back up, give your wheel a wiggle to see whether the adjusters are in the correct place. When tightening everything back up, remember to use your torque wrench to set the correct values and use your free hand to put tension on the chain. Once everything is done, pop some chain lubricant on and give it a last check over, and then you are done!
Motorcycle Maintenance: Oil
How to check your oil:
Checking your motorcycle oil levels is a simple task to carry out. Most motorcycles out there will have an inspection window on the bottom right side of the engine.
Start by positioning your motorbike upright while the engine is warm, and check the oil levels are between the full and empty markers. Motorcycle oil does tend to evaporate at high heat, so if you’re someone who commutes or uses your bike regularly, you will need to keep a frequent eye on your oil levels.
If your motorcycle does not have an oil-level window, then it'll likely have a dipstick. Again after it has warmed up, remove the dipstick and wipe it on a clean cloth, then insert the dipstick back fully and then remove, you should see the oil level against the dipstick, the oil level should be between the minimum and maximum marker.
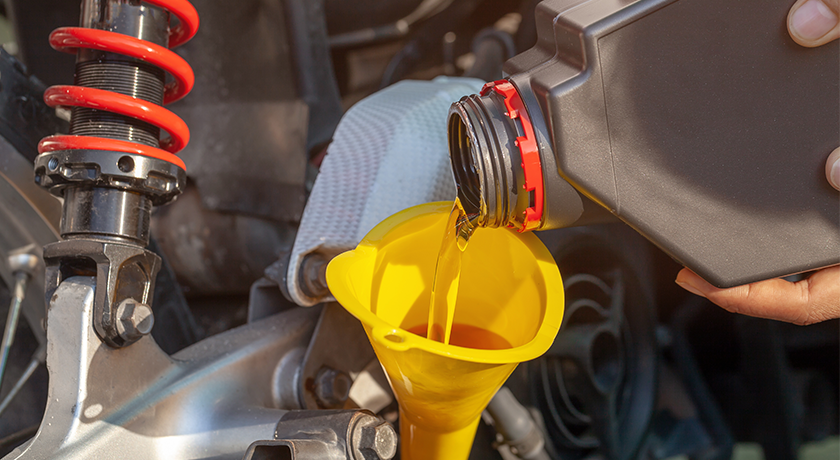
How to change your oil:
In order to keep your engine running both efficiently and properly, you will need to keep on top of changing your motorbike oil regularly - Please make sure to follow your manufacturers' guidance.
Below is a basic overview of an oil change, but should not replace manufacturer guidance for your own specific model:
Step 1:
First things first, you’ll want to warm your motorcycle up by riding it for at least 5 minutes.
Step 2:
After 5 minutes, turn the engine off, stand the bike upright, and then remove both the drain plug and the oil fill plug. Make sure to have an oil collection tray ready in place too.
Step 3:
Next, you’ll want to take out the oil filter, a little warning this one can get a little bit messy so try to cover the engine and exhaust section with aluminum foil to prevent spillage).
Step 4:
After you’ve drained the oil, install your new oil filter and put back all the parts you removed. You can then refill your bike with new oil (using the correct type for your bike) this can be done using a funnel, making sure to add the right amount declared by your manufacturer. Always best to have this measured precisely.
Step 5:
You can now shut the oil fill cap up and dispose of the used oil at your local bike shop.
Step 6:
After you have ridden your motorcycle for a short period of time directly after carrying out an oil change it is best to check your oil levels again, to make sure they are still right and where they are expected to be.
When carrying out tasks such as this, it is handy to try and have suitable equipment for this, so you want the correct tool to remove the plug, etc, but also have an oil collection tray or container, to make sure the oil doesn't make a mess.
Motorcycle Maintenance: Checking and Replacing Filters

How often do I need to replace a motorcycle air filter?
In general, it is recommended that you replace your air filters every 10,000-15,000 miles depending on the type of air filter you have - again check your owner's handbook for your model.
How to change an air filter on a motorcycle:
Much like changing your oil, changing your air filter should be a pretty simple task and can be completed in just a few steps:
Step 1:
First up, you will need to locate where your airbox is stored, you may be able to find this information in your owner's manual, however, if not one quick google search will help you out.
Step 2:
The first step to changing your filter is to access it, on some bikes the filter may be hidden under the tank, however, on other bikes some filters are located to one side, making the process far easier.
Step 3:
If the air filter is to one side, all you will need to do is simply unscrew and remove the cover. However, if it is sitting under the tank you will need to unscrew and remove the cover of your tank and then lift gently to disconnect the hose from the radiator. This can then be lifted completely and continue to remove the screws and take off the tank.
Step 4:
Next up, you will need to switch the fuel inlet off and lift the tank to further release the fuel gauge and the other cables. Once this is done you should be able to locate the air filter and remove it with a screwdriver.
Step 5:
Once you have reached the airbox, you can either use compressed air or a brush to clean off any first or debris that is sitting stagnant on it. Once clean you can open it and remove the old air filter.
Step 6:
Once you remove the old filter, it is advised you replace it with a new one immediately, some aftermarket filters may require treatment before fitting so prep this before removing the old one. Leaving the airbox open could lead to unwanted dirt/debris getting into your engine, so be very cautious.
Step 7:
Now the new filter has been fitted, you can begin to reconstruct your bike and put everything back in its original position before you start to take some photos of your bike to help you align things back together correctly.
Last but not least, if you have any other questions or queries about motorcycle oil, head over to our FAQs blog!
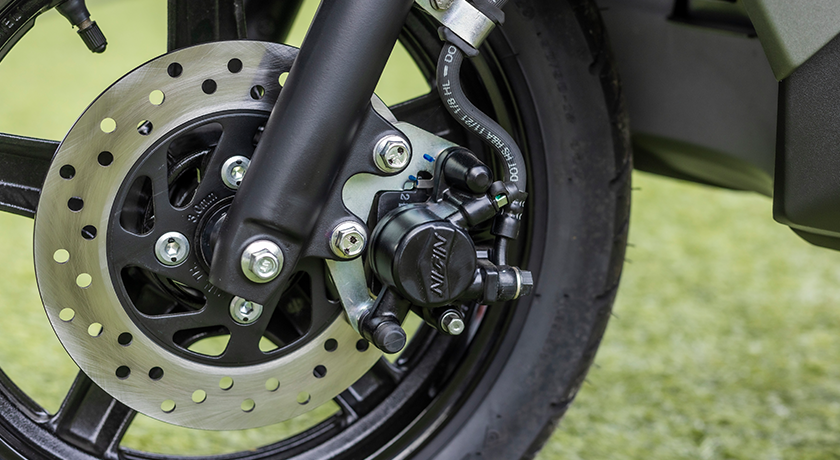
Motorcycle Maintenance: Brakes
Now onto brakes...
Faliure to take care of your motorcycle brakes can and will result in your brakes having unwanted and preventable damage or uneven wear.
Motorcycle Brake Calliper Servicing
When carrying out maintenance tasks on your brakes, it is important to work slowly and cautiously. Poor brake performance from your calipers can be caused by a variety of problems, so it is important to check everything thoroughly to find the root of the issue.
To perform brake caliper maintenance, you will need to:
Step 1:
Unbolt the caliper and slide it off the disc, WITHOUT pushing the pads back into the caliper.
Step 2:
Once the caliper has been removed you can then begin to clean the exposed piston and clean using brake cleaner.
Step 3:
fter you've finished cleaning, apply some suitable rubber grease to the same area, remembering not to spread it everywhere as you do not want it to get into your pads.
Step 4:
Now that everything is clean and greased, you can place the caliper back onto your bike, making sure you put everything back in exactly where you removed them from.
Replacing Motorcycle Brake Pads
Brake pads are the one thing that tends to wear quite quickly on most motorcycles, so it is always worth keeping a good eye on them when carrying out your routine maintenance checks.
To check your pads over, take a look inside the brake caliper and if the pads are getting to the 2mm mark, this would be a good indicator you will need to replace them.
How to: Replace Motorcycle Brake Pads
Motorcycle brake pads are again one of the most important components on your vehicle, and not having effective pads can put you in some serious danger.
Replacing your pads at home should be a fairly easy task to carry out provided you take your time. So with that being said, let’s get started, shall we?
Tools you will need
- High-quality spanner/ pliers
- Allen Keys
- Old cloth
- Brake cleaner
- Brake fluid (suitable for your specific bike)
Step-by-Step Instructions
Step 1:
Start by loosening any pins or screws which are holding the old pads in the caliper before you remove the caliper itself.
Step 2:
Now you can begin to loosen the caliper bolts fully being careful not to let the caliper touch the brake hose. You can move the caliper out of the way by tying out the way or holding it in place - you will also need to make sure that you do not disconnect the hose.
Step 3:
After your caliper is well out of the way, you can use pliers to remove any other pins and clips that are holding the old pads in position. At this stage make sure you are carefully storing any parts you remove in a safe place. Next, remove the old pads and make sure they are the same as your new set.
Step 4:
Then, gently operate the front brake lever so the pistons shift out of their bores making sure not to pump the lever and force the pistons out or this will mean you will need to bleed your system (an extra added task I imagine you would like to avoid).
Step 5:
Once this has been done, you can begin to clean the caliper using some spray cleaner and a cloth. You’ll want to pay some extra special attention when cleaning the exposed ends of the piston and around the fluid reservoir.
Step 6:
To prevent brake squeal, add some grease to the rear of each of the brake pads and pins, then reattach the new pads and pins in with the friction side of the pad facing the disc.
Step 7:
Once everything has been replaced you can then manoeuvre the caliper back onto the brake disc, making sure that there is a pad on either side of the disc. Then grease and reattach the caliper bolts.
Step 8:
Next you will need to readjust your pistons to the pads - you can do this by pumping the brake lever a few times.
Step 9:
Last but not least, once you have checked that the brake fluid reservoir is fully topped up, you can replace the diaphragm and cap then - you are done!
How to check Motorcycle drum brakes for damage
If you want to check your drum brakes for any uneven wear or damage, start by:
Step 1:
Remove any debris stuck in the surface and clean with a wire brush.
Step 2:
Once you have done this, clean away any traces of oil and grease with brake cleaner, if there are any high spots you can sand them down for a uniform thickness.
Step 3:
You can then use steel wool to remove any dust from the drum and again spray with brake cleaner to remove any grease.
Step 4:
To inspect the damage, measure the drums' inside diameter with a ruler or caliper measure (depending on what you have on hand) and measure in serval locations around the drum - if you find the measurements go beyond the servicing limit, you will need to replace the drum.
It is also worthwhile when inspecting your drum brakes to look for any damage or leaks in your brake seals. If you see anything of the sort, it goes without saying, you will need to replace them.
How to check your motorcycle brake fluid levels
When it comes to brake fluid, most manufacturers will recommend changing it at least once every two years. This is due to the fact brake fluid absorbs moisture, and the more water that it absorbs, the lower the temperature at which it boils, ultimately affecting your braking performance.
Changing the brake fluid in your motorcycle shouldn’t vary too much between manufacturers, and can be carried out in a few steps:
Step 1:
Get the front brake cylinder as level as possible, then loosen the bleeder screw and attach one end of the tubing onto it with the other end into a pan.
Step 2:
Pour enough brake fluid to submerge one end of the tube, this will help stop air from getting into the caliper.
Step 3:
Start by opening the bleeder screw and pull the brake lever slowly until the lever bottoms out, then close the bleeder. Release the lever and then repeat until you see clear fluid.
Step 4:
You can then tighten the bleeder back up and top up the reservoir and lastly either put the cap back on or move on to the second caliper (the rear brake is also done in the same way).

Bleeding your motorbike brakes
Ideally, you should be bleeding your brakes at least once every two years, or if the brake fluid has turned from a clear substance to a brown/black coloured liquid.
There are a few warning signs to look out for meaning that you will need to bleed your brakes such as reduced braking power, sponginess in the lever, or inconsistent braking.
Motorcycle Maintenance: Spark Plugs
Most spark plugs tend to have a life expectancy of anywhere between 15,000-20,000 miles. This is due to their location on your motorbike, sitting on the top of the engine close to the engine chamber, meaning they get extremely hot and materials begin to break down quicker.
There are many indicators that will tell you that you need to change your spark plugs such as your engine misfiring, flooding in your engine, or you may find that your plugs themselves are burnt, broken, or corroded.
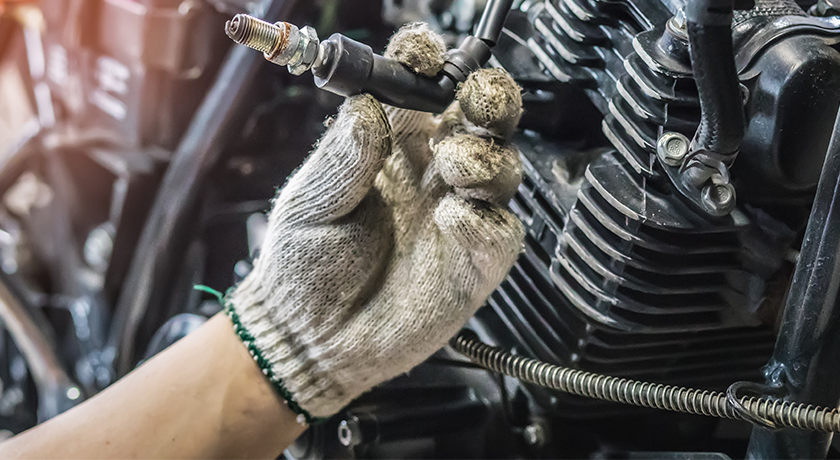
How to check and replace your spark plugs
You’ll be pleased to know that both checking and replacing our sparkplugs is a fairly simple job - To begin you will need a torque wrench, a brush, and a wire spark plug gauge.
We have written up a handy 10-step guide on how to check and replace your motorcycle spark plugs, so if you have any queries head over to our Motorcycle maintenance: When and how to replace spark plugs blog!
Motorcycle Maintenance: Forks
Motorcycle forks are another component of your motorbike that you should be checking regularly for any issues…
Reasons why your motorbike forks are bent
There are many reasons why your motorcycle forks might be bent, such as:
- You have an accident/collision
- Constant heavy braking
- Overloading/improper loading
Very minor bending of your forks will not affect your city riding or commuting, however, your bike will most certainly feel less stable and may have the tendency to vibrate more, especially at higher speeds.
It is worth noting that if you do think that your motorcycle forks are bent or damaged in any way, take it in to be repaired by a professional, this is an extremely tricky and precise task that you would struggle to carry out at home.
How to check your bike springs
If you need to check that your springs are still correct, an easy way you can do this is by measuring the ‘free sag’ in your spring.
This sag is measured without your weight on the bike and should be anywhere between 0-5mm with the bike off the stand and on its own. You should also be able to lift the rear end up just slightly and top out the suspension.

Motorcycle Maintenance: Battery
To keep your motorbike running smoothly and in tip-top condition, keeping your motorcycle battery in good running order can help.
There is simply nothing worse than getting stuck in a car park or on the roadside with a flat battery…
Make sure to keep your battery charged
An important task to keep on top of when it comes to your motorcycle has to be to remember to keep it charged at all times. While riding your motorcycle regularly can help keep the battery charged, you should be attempting to try and charge your battery regularly, some might even say once a week when the bike is not in use, but you could always make life easier by fitting and using a trickle charger.
Motorbike batteries can be jump-started much like car batteries, however, it is always advisable to take care of them and keep them charged so this shouldn’t have to be done.
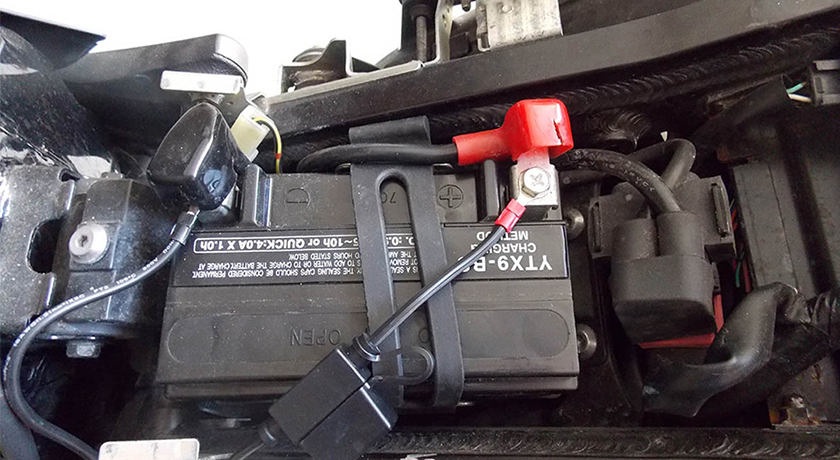
Remember to fill the battery with fluid
There are two types of motorcycle batteries on the market currently. Most motorcycle batteries are sealed and come pre-filled with the battery fluid, or will need filling before you install them - These are called maintenance-free batteries.
However, if you have a regular-type motorcycle battery, you will need to top up your electrolyte cells with distilled water.
The water levels should be checked regularly at a minimum, and levels should be sitting in between the minimum and maximum level markers. We would recommend using distilled water as it has no impurities in it and means your batteries need to work a lot less when performing, preserving them for longer.
Last but not least, if you’d like to read up more on motorcycle batteries why not check out:
- How to Prepare a Maintenance Free Battery for the First Time
- How to Change a Motorcycle Battery Step-by-Step
Motorcycle Maintenance: Cleaning your Motorbike
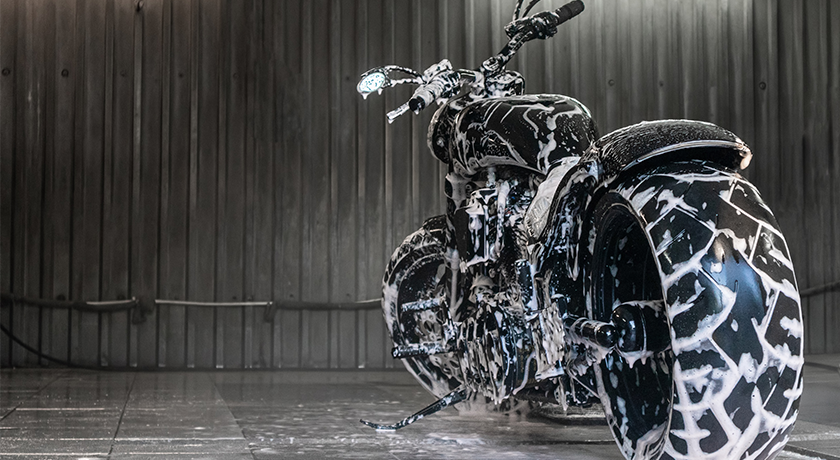
Regular cleaning of your motorbike is one of those tasks that you absolutely love or absolutely loathe. Regardless of how we personally feel about it, it is important that you keep up with the cleaning tasks to help your bike last and look brand new for longer:
Step 1:
Start by cleaning the chain.
Step 2:
Degrease the engine and wash the frame.
Step 3:
Clean your disc brakes and brake pads.
Step 4:
Remove any remaining dirt, bugs, or tar.
Step 5:
Finish by polishing your motorbike and re-lube the chain.
While this may be a slightly simplified list of steps to follow, you’ll be pleased to know we have a full in-depth step-by-step guide to cleaning your motorcycle or moped ready for you to take a look at!

Ready to ride!
So there you have it, here is our handy go-to guide on everything DIY motorcycle maintenance.
This article is more of an overview of processes, it is always best to consult your owner’s manual, manufacturer, dealer, or mechanic for precise information regarding your motorcycle, and never attempt any maintenance yourself unless you are fully aware of the process needed and have the skills and tools to be able to carry out the work correctly.
Last but not least, if you do need insurance on your very own motorbike, why not head over to Lexham’s motorbike insurance page?