A dead battery can be one of the more common problems a motorcycle or scooter owner may face, especially if your bike has been laid up for some time. A good way to counter this problem is with a trickle charger like an Optimate. It can keep your battery topped up and healthy if you aren't going to be using it for a while, and even extend its lifespan.
If you do find yourself with a dead battery, the good news is that it is one of the easiest things to replace!
In this blog, I'm going to be running through the process of swapping out a battery on my Kawasaki ZX6R, and although things can vary slightly depending on the exact make and model you own - hopefully this will give you some helpful info on what to expect!
So without further ado, let us get into it shall we?
How to prepare your motorcycle battery
The first thing you will need to do is find out which battery you actually need, and there are a few ways to do this. You can either open the bike up and see what's inside it currently, check your service manual or, simply use the internet.
However, if you would prefer not to open the bike up, you'll be pleased to know that Halfords has a handy feature on their website allowing you to type in your reg number and then gives you the answer as to which battery you need, with the option to purchase it right there. I have used this feature a few times now and it has always worked out very well!
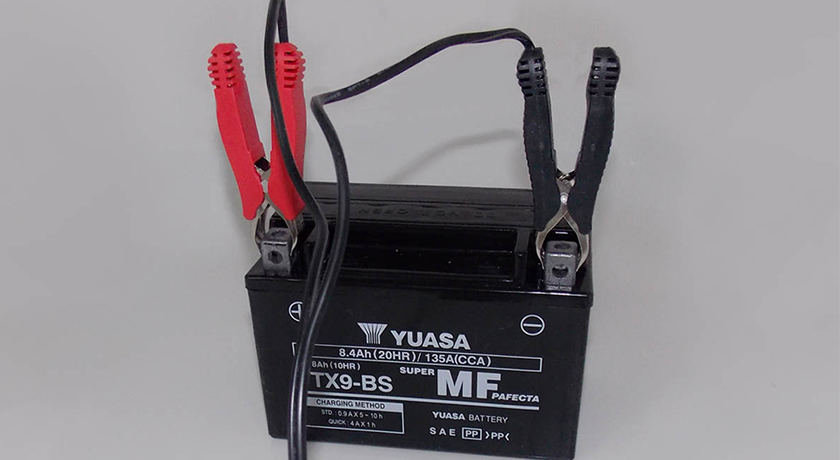
I've chosen a maintenance-free battery from Yuasa, which does require a small amount of set-up, but that too is pretty simple and comes with full instructions. If your battery comes ready to go, then you don't have to worry about it, just charge it up as per the battery instructions (I use my Optimate with crocodile clips and leave it for around 6 hours for a full charge).
How to change a motorcycle battery
Step 1: Locating the battery
OK now you have the new battery charged and ready to install, we are ready to go. The first thing you will need to do is locate where the battery is stored within your bike. The manual should tell you this or, if you don't have access to your manual, an internet search will likely reveal the answer. From there, you will be able to see which tools will be needed to access it.
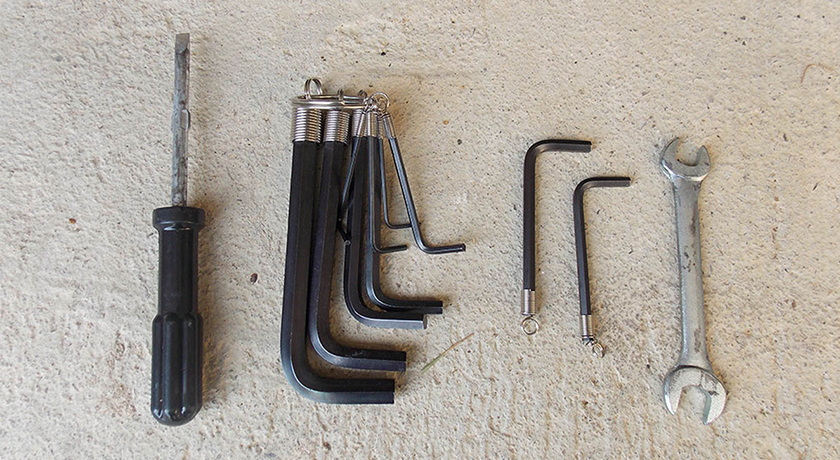
In my case, it is located under the seat, which is pretty common, and getting to it can be done with only the bare minimum tools. I'm just using the little travel toolkit I keep in the rear seat storage space, which will more than do the job - a flat head screwdriver, an allen key set and a 12.5mm spanner (again this is what is needed for my bike but check your own bolt sizes and battery location and ensure you have what you need for your bike).
Step 2: Accessing the old battery
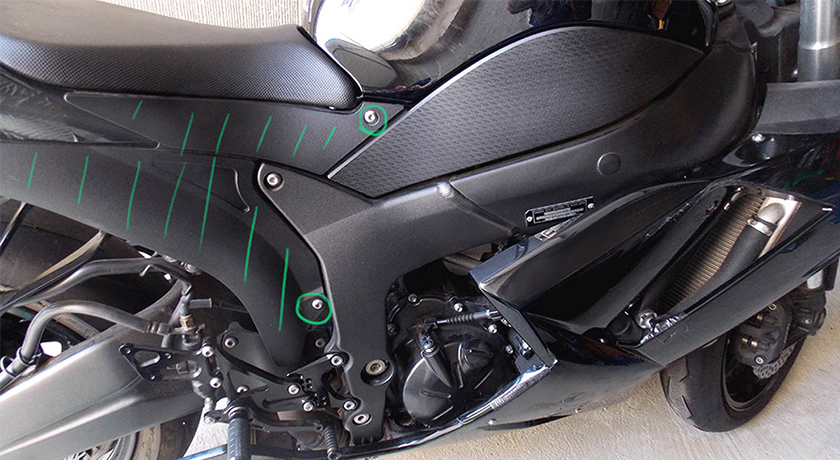
On the Ninja, I need to remove 1 piece of plastic on each side. The right side panel marked out in the picture is secured with 3 bolts, 2 are shown and the 3rd is located under the tail. Once the bolts are removed, the panel will just pop off for easy removal. After you remove any panels, I would recommend loosely screwing the bolts back in to make sure they don't get lost.
On the other side, it is even easier. Just a single bolt holds the panel in place and once removed, it too pops right out. Now that the panels are removed, I can get to the bolts that connect the seat. There is one bolt on each side to be unscrewed and then the seat will slide right out and the battery compartment is revealed. Easy as that!
Step 3: Removing the existing battery
Now that we've gained access to the battery, it's time to disconnect and remove it. It is best to start with the negative cable (this should be coloured black and connected to the '-' terminal), that way you immediately break the circuit and remove the chance of causing any damage by accidentally grounding the positive terminal.
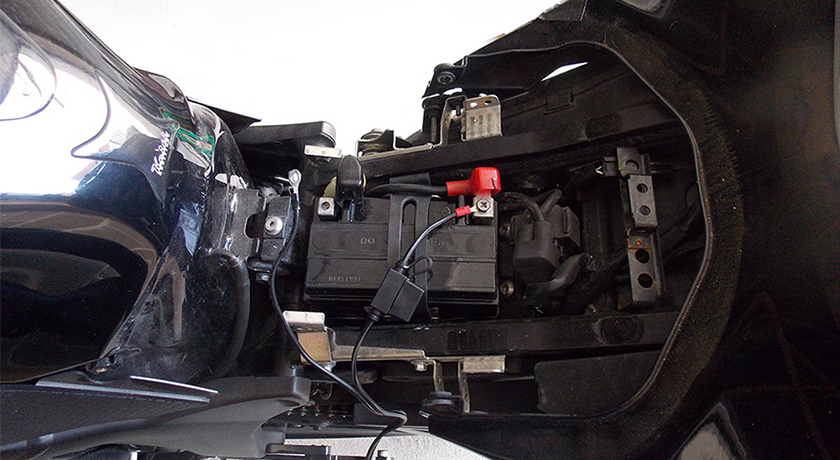
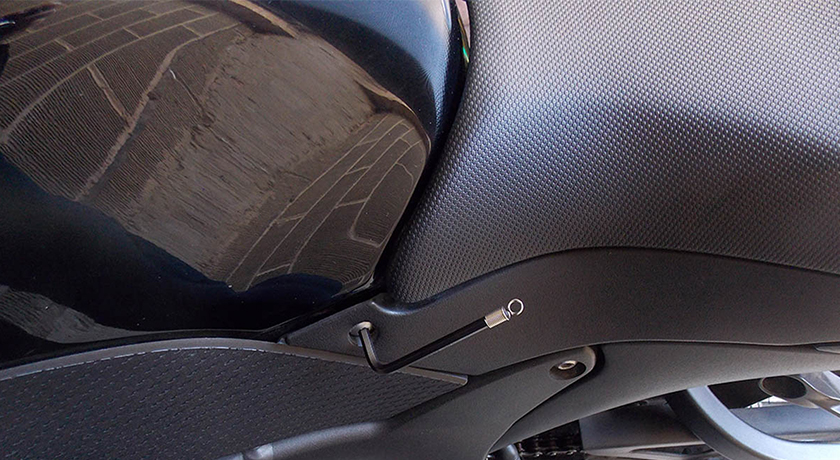
Once both cables are disconnected you can pull out the battery. In my case, it is held in place by a rubber strap, so I will need to remove that first. The strap clips onto a catch on the side of the battery compartment, applying some pressure to the clip will pop it loose. This can be a bit fiddly but it is straightforward and just requires some patience. The battery can now come right out - but take extra care of the nuts that the bolts screw into to hold the cables in place on your battery terminals. You wouldn't want to drop one of these into a shadowy area of your bike, never to be seen again. The Yuasa battery does come with spare nuts and bolts, so it's good to have these on hand just in case.
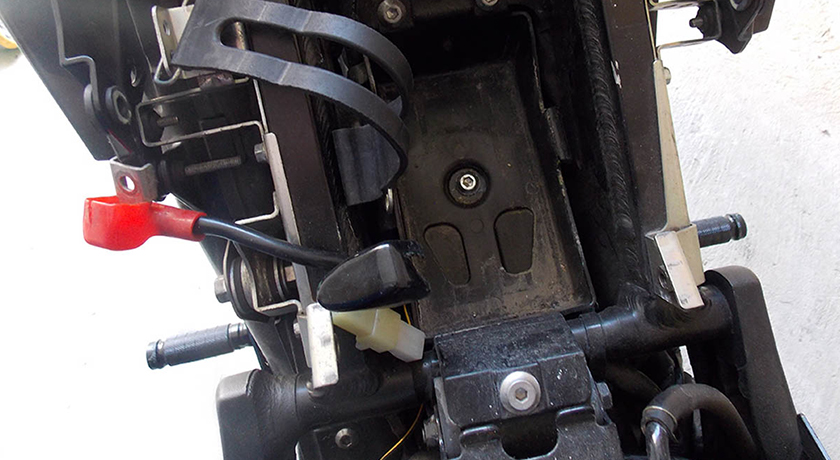
Step 4: Insert the new battery
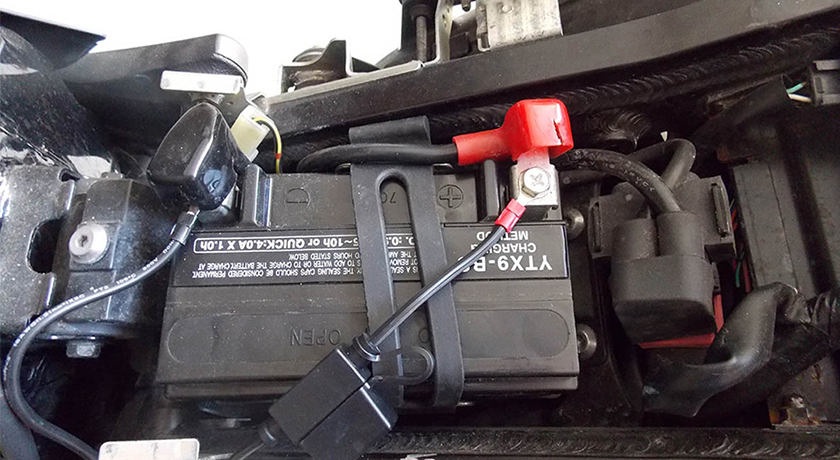
Put the nuts into place on the terminals of the new battery, either re-use the existing ones you took out or use new ones if they came with your battery. Slot the newly charged battery into your bike - if you did your preparation and got the correct battery it should just fit straight in. If you do find a problem slotting it in place then double check you definitely have the correct battery! If it is all correct, but for some reason, the only available battery is a different shape from the one it is replacing, you may have to get creative and find a way to securely hold it down. In my case, the Yuasa YTX9-BS fits into my ZX6R perfectly with no issues!
Reconnect the cables in reverse order this time, with the red positive cable connecting first and then the black negative (if you have a battery tender like an Optimate, now would be the time to fit the SAE charging lead, as shown in the image below. For a guide on that see this blog [link]). The cables should bolt easily back into the nuts you placed in the terminals previously.
Step 5: Make sure the battery works
With the new battery fitted, before you put any panels or seats back on, just turn the key in the ignition and make sure the lights come on, that way you will know if there are any issues straight away, and won't have to take everything back off to deal with it. If it is all good, then replace the panels the same way you took them off and you are ready to go!
Step 6: Success
So there you have it, once you complete all fo the steps above you have finally fitted your brand-new battery!
Replacing a battery might be a bit intimidating if you are new to motorcycles or not mechanically minded, but it really is a straightforward task which with a bit of preparation and some help from the internet, can be done in just a few minutes. Trust me, if I can do it - so can you!
The Last Stop!
I hope you enjoyed my step-by-step guide on how to change a motorcycle battery...
Last but not least, if you have a motorcycle you need to insure, make sure to get a motorcycle insurance quotation direct from Lexham.