It goes without saying that every scooter and moped needs to be looked after and requires regular services and cleaning for them to run reliably and efficiently. However, when it comes to classic scooters, due to their age they will just need that extra little bit of TLC to keep them running mile after mile.
But the question is, how can you service your scooter at home? We already have a guide on how to carry out at-home maintenance on a modern motorcycle or scooter, however, in this blog we are going to be going through some classic scooter-specific tasks you can follow through with at home.
So without further ado - let’s get into it, shall we?
How to: Cleaning your classic scooter
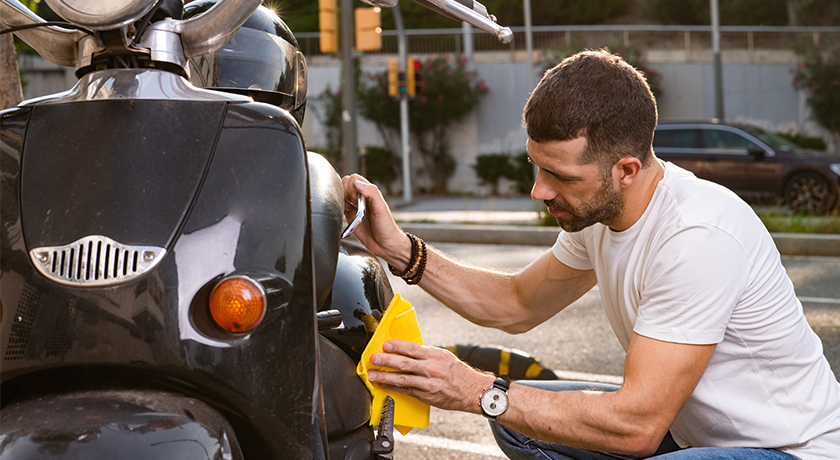
The first step of carrying out maintenance tasks on your classic scooter will be to give it a thorough clean, not just a quick splash cover with some washing-up liquid and a sponge - instead, a full-on valet-style type job using good quality motorcycle and scooter shampoo.
Not only will the result be a clean scooter you’re proud of, but the process of cleaning it will involve you going all over the scooter and at the same time checking it out intimately for any wear and tear that may otherwise have gone unobserved.
- Start by cleaning the chain
- Then degrease the engine and wash the frame, making sure to get into all of the gaps and crevices
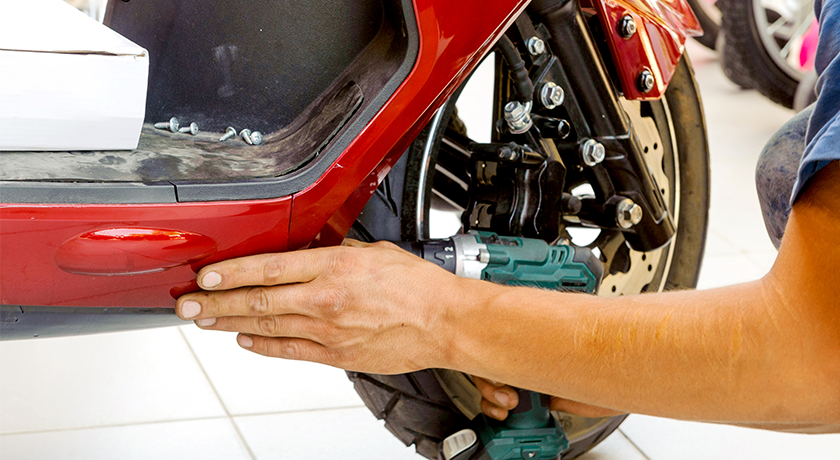
- Clean the brake discs and brake pads*
- Remove any remaining dirt, bugs or tar still on your scooter
- Finish off by giving your scooter a good polish and re-lube the chain
It is worth noting that this is a very simplified version of our step-by-step guide on how to clean your scooter, so make sure you head on over to our fully comprehensive guide for more.
*If you do intend to clean your brake pads at home, please make sure to use a specialist brake cleaner as well as follow the guidance given by the manufacturer.
Classic scooter maintenance: greasing the moving parts
Another way to maintain your classic scooter will include greasing the moving parts. If you are lucky enough to have a classic from before the 1950s, manufacturers seemed to be very keen to fit grease nipples into their vehicles. To grease these two-wheelers you will need to invest in a greasing gun and start to lube them up.
Fast forward a few years and, due to the lack of use, advancing development saw manufacturers give up on greasing nipples after the 1960s meaning that whilst these vehicles still need lubing it is far far easier. Apply lubrication to areas such as the:
- Brake and clutch levers
- Brake pedal
- Stand spring
Often these areas, especially those on the underside of the scooter are neglected by their owners which can seriously affect their overall performance thanks to them being highly susceptible to dirt, grit and salt from the road. The moral of the story is, to make sure to keep them clean and lube them up before it’s too late!
Classic scooter maintenance: Cable maintenance
Again, this is another task that is easy enough to carry out at home but many people forget to do it. Checking over your cables can be done whilst cleaning your scooter, it is just essential to keep your eye on - especially if your scooter is older and has clocked up a few miles!
Most modern bikes only have one or two actual cables, the clutch and throttle, however on older scooters you can also be dealing with two gear cables, a front brake and rear brake cable, plus a choke cable. These cables need to be kept adjusted and well-greased in order to maintain their performance for as long as possible.
Signs your cables need replacing
A quick inspection can give you early indicators of wear meaning they will need replacing, such as:
- Frayed ends
- Stands of loose cable
- Starting to feel stiff or unresponsive
It’s well worth getting used to changing cables at home and carrying spares, especially when trying to maintain an older scooter. Snapping on the cables can be seriously detrimental to your safety when riding on the roads!
Classic scooter maintenance: Topping up the oil and coolant levels

When carrying out DIY maintenance tasks at home, another thing you can do is check your oil level and coolant levels (providing your scoot is water-cooled). Ask yourself, have you been noticing any leaks? If the answer is yes then this is one for the professionals and it is advised you take it to a garage.
This should be done frequently, especially if you are in possession of a two-stroke scooter. When it comes to two-strokes it is advised that you check the oil levels in the tank every time you stop for fuel as waiting for the oil level indicator light to turn on may be a little too late and can potentially cause damage to your engine.
When topping up your oil levels make sure to only use two-stroke engine oil specifically formulated for motorcycles or scooters, again using the incorrect fluids can cause detrimental damage to your beloved scoot.
Classic scooter maintenance: test your battery
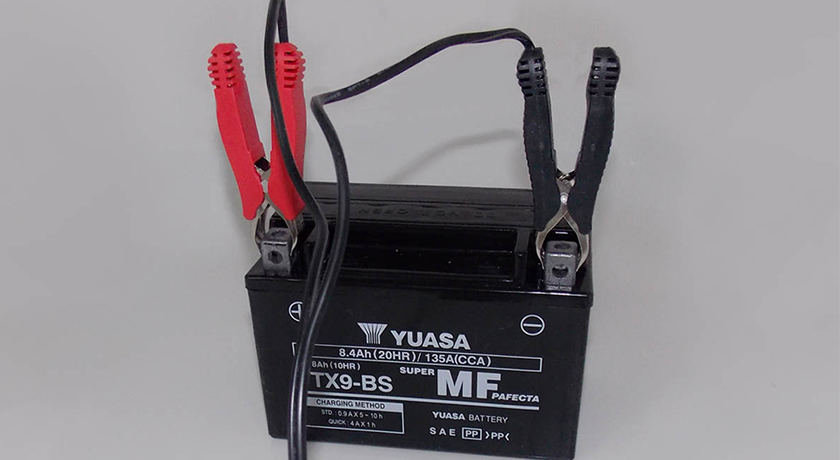
The next thing you’ll want to do is test your scooter battery. The best way to test your battery is by using a good quality battery power tester. Good quality power testers can typically determine the overall health of your battery as well as recommend further action needing to be taken.
Whilst testing your battery it may be well worth your time checking if the demineralised water levels need to be topped up. Now if you have a sealed, maintenance-free battery, then you will not need to do this. Typically your battery should be located underneath the seat or in the front faring - this will vary between manufacturers so it is always worth checking your owner's manual.
Does my battery need replacing?
If you have noticed your scooter has had trouble starting up, it may mean that you need to replace the battery. Obvious warning signs found via a simple visual inspection can include broken terminals, cracks or bulges in the plastic casing, as well as any leaking of fluid or discolouration.
Upon research there are plenty of affordable batteries out there that will fit in a variety of classic scooters - just make sure to do your research!
Classic scooter maintenance: replacing your headlight bulbs
The headlights as well as other lights on your scooter are both important for the safety of you as the rider, as well as the other road users. This means that keeping your headlights in working order should sit very high on your priority list.
Signs you need to replace your headlight bulbs
There are many ways that you can tell your headlights need replacing such as:
- Your headlight is dimmer than it usually is
- It has burnt out
- The headlight is flickering
- Cracks found in the bulb case
- Any fluid surrounding the bulb
How to replace the headlight bulb
Replacing your classic scooter headlight bulb should be a fairly simple task to carry out provided you take care and take your time. You will need to consult instructions for your specific model, on how to access and reinstall the lighting unit but essentially you will need to:
- Select a new bulb
- Disconnect the pre-existing bulb
- Prepare the new bulb
- Connect the new headlight bulb to your bike
- Remember: always be prepared for the worst!
Whilst this may seem like an extremely vague step-by-step on how to change your bulb, you will be pleased to know that we have covered everything to do with headlight bulbs in depth in our Motorcycle Maintenance: Guide to checking and changing motorcycle headlight bulbs article!
Classic scooter maintenance: checking the tyres
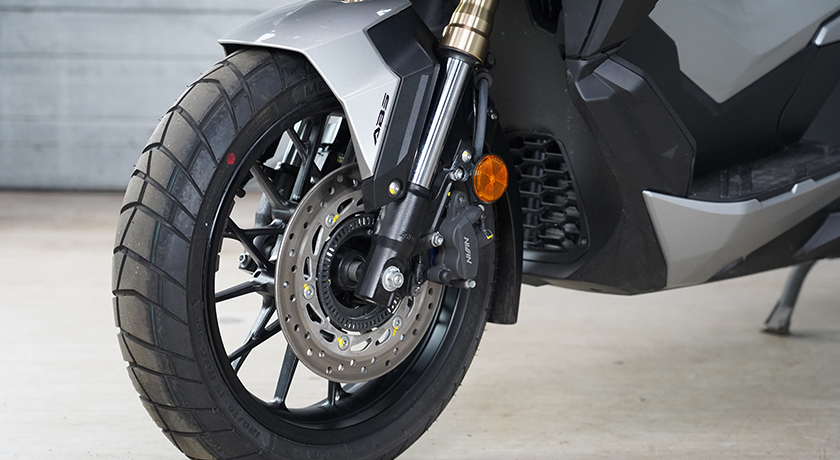
When checking over your beloved scooter, two of the most important components to look at have got to be your tyres. Your two tyres are literally the only point of contact with the road, meaning checking that these are all okay before getting up and going is essential.
Checking the tyre pressure
In order to check your tyre pressure, you will need to locate the valve stem (which should typically sit on the inside of the wheel) and attach a pressure gauge system.
Compare the number on the gauge in comparison to the recommended number displayed on the sidewall of the tyre, both deflated and over-inflated tyres can accelerate the wear of tyres while also affecting the overall handling of the scooter in a negative way.
If your tyres do need inflating, you can either do this at home using an manual or electric air pump. Alternatively, if you do not have one of these at home, there are plenty of petrol stations across the UK that will have a machine you can use.
Checking the tread depth
The tread of your tyres will also need to be examined, with most quality tyres these days having a Tread Wear Indicator (a little rubber knob that resides in the groves of the tyre), which can really help us to identify when the tyre needs replacing easily.
A good indicator that your tyres will need replacing is if the indicator is at the same level as the rubber which meets the road. On the other hand, if you would prefer to use a gauge, you can pick up a handy little motorcycle tyre tread gauge for your scooter for just £7.99.
Replacing your tyres
If you have a classic Lambretta or Vespa with interchangeable wheels, then you’ll be pleased to know that changing your wheel at home shouldn’t be too tricky. It is worth noting that if you are not confident in yourself to change a tyre, then it is advised that you go straight to the professionals!
Step 1:
If the wheel has the original split rims, once you have removed it from the scooter and deflated it, splitting the rims to change the tyre isn’t too difficult. You may find that the tyre has become stuck on the rim, so if this is the case you can either use tyre levels to separate the two or cut off the tyre - providing that it cannot be used again.
Step 2:
Once the tyre is off if the rims are subsequently examined and discovered to be rusty, these should be cleaned and repainted before new tyres and inner tubes are fitted to prevent flakes of rust potentially puncturing the wheel. By the way, it should go without saying that if you are in any way unsure about reusing the inner tube then replace it - also don’t even think of repairing a puncture!
Step 3:
When reassembling the wheel, do not trap the inner tube between the two rim halves. We’d recommend using new nuts and washers when attaching the rims, making sure they are securely tightened.
Classic scooter maintenance: Spark Plugs
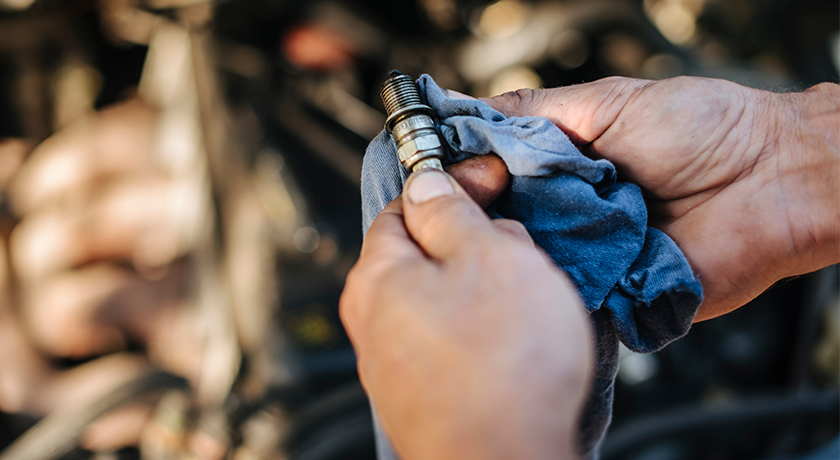
One element of your scooter that you should regularly check has got to be the spark plugs. If you ride a two-stroke, you might have to do this at the side of the road one day when it gets oiled up.
How to check your spark plugs
Step 1:
First things first, you should remove the plug by using a spark plug-specific spanner, making sure to inspect the plug thoroughly. The colour of your sparkplug is typically a good indicator of how effective it is working.
If your spark plug is light brown, the general rule means that your plug is okay and working efficiently. On the other hand, if you see any signs of burn marks, broken tips, or corrosion to the plug, this may mean that you will need to replace your plug.
Step 2:
Once checking your plug over, if it is in need of a good clean, make sure to get a wire wool brush and give it a scrub. Once finished rinse it off with some WD-40 or something similar and you should be good to go.
Step 3:
Now your spark plug is clean, you can start to think about reattaching it. The gap between the electrode and tip should also be measured and set using the feeler gauges. It is worth mentioning that the specific gaps will differ from bike to bike, so it is always worth either checking your handbook or giving it a quick Google to see which distance is correct for your scooter.
*For more information regarding spark plug maintenance, check out our DIY article!
The Last Stop!
So there you have it, here is our handy go-to guide on everything DIY classic scooter maintenance.
It is worth noting that this article is more of an overview of processes, it is always best to consult your owner’s manual, manufacturer, dealer, or mechanic for precise information regarding your motorcycle, and never attempt any maintenance yourself unless you are fully aware of the process needed and have the skills and tools to be able to carry out the work correctly.
Last but not least, if you are in need of insurance for your classic scooter, make sure to get an insurance quotation direct with Lexham!