So, you’ve gone and got your very first motorcycle. It’s an exciting time and one forever remembered in the memories of nearly all bikers; that feeling of first sitting on the seat behind the bars gets transformed into a lifetime memory, so cherish these days as it’s one of the most important times of being a motorcyclist, but you have to do it right, and that’s what this article is all about.
1. Preparation and Safety
Before we start, I cannot emphasise enough the importance of the appropriate gear. You will need a protective motorcycle jacket, gloves, trousers (or approved riding jeans), boots (or riding trainers) and an approved helmet meeting either the ECE 22.05 or ECE 22.06 regulations.
It is also vitally (& legally) important that you gain at least a CBT Certificate or have an A1, A2 or Full motorcycle licence before heading out on the road, too.
There’s a saying I’ve carried with me for as long as I’ve been riding, which goes: ‘dress for the slide, and not for the ride’. If you take this with you, you are already in the best position in case things turn rubber side up.
Top tip: Always dress for the slide, and not for the ride. Motorcycle gear is crucially important, even in the hot weather when shorts and trainers may seem tempting.
2. Basic Controls
As you sit on the bike (if it’s a manual), take notice of the left lever, as this is your clutch. The one on the right? That’s your front brake.

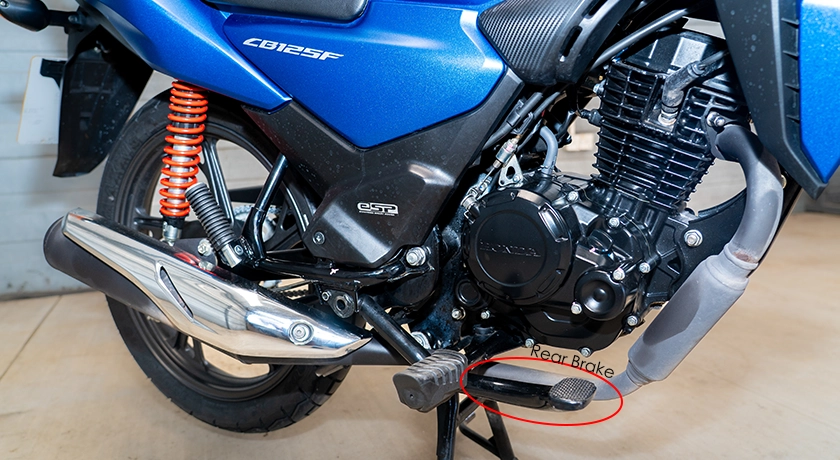
If you look down by your feet, in front of the left footpeg is your gear lever, and on the right footpeg is your rear brake. Simple, right?
So, that’s the brakes, gear lever and clutch sorted, but what about the rest of the bike? In reality, there isn’t much else in terms of control, and it really is that simple aside from the obvious throttle being on the right side of the handlebars.
The slightly more complicated part comes with knowing what to do with all these controls, and that brings us to the next section.
Top tip: Take the time to sit with the bike before you go out and learn the controls. Get a feel for it and familiarise yourself with where everything is.
3. How to Start a Motorcycle | Finding the Biting Point
If you drive a manual car already, then the concept of the biting point should be familiar, and it’s really no different on a motorcycle, just in a different layout.
If you have access to private land, I’d suggest this is a top place to practice, and if possible, bring someone along who knows how to ride a manual already, as this will help you learn where you’re doing well and also where you’re going wrong.
Top tip: If you suddenly find the bike is out of your control, pull the clutch in, and that will cut power going to the wheels immediately before applying the brakes, and also make sure there is plenty of clear space in front of you in case things do take a turn.
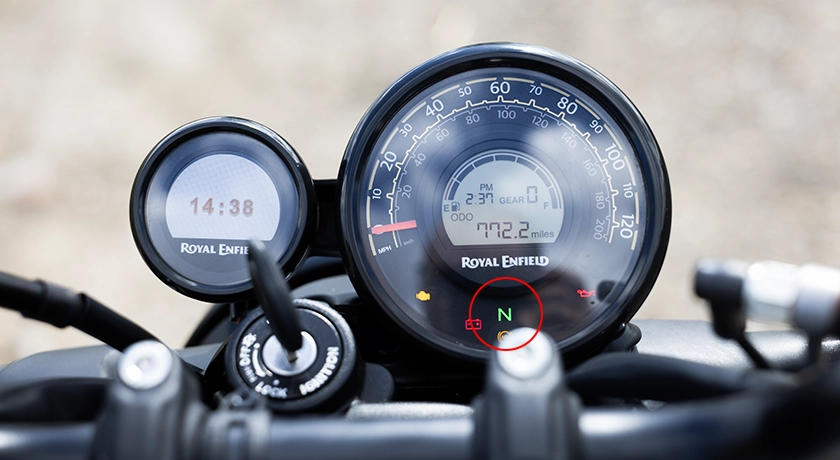
Once you are ready, begin with the bike in neutral (typically indicated by a green ‘N’ on the dash; if this doesn’t display, it means it’s in gear, so click the lever by your left foot down or up a click or two to find neutral), let the bike idle and pull the clutch in. Once your left hand has the clutch pulled in towards the grip, knock the gear lever with your left foot down one click, and you should hear a distinctive ‘clunk’ sound.
Now your bike is in first gear; don’t let the clutch out until you’re ready. Slowly add a touch of throttle with your right hand, increasing the revs gradually but not too much, and as you do so, let the clutch out slowly too.
You’ll feel the point where the revs and clutch match, and this is called the ‘biting point’, the moment the bike begins to move away. Keep practising this part, but don’t ride off just yet. Allow the bike to rock forward a little, then clutch in, find neutral, retry again and so on. This will allow you to really get a feel for where the biting point is. This part takes time, and as I said before, don’t rush, and prepare yourself to make mistakes.
4. How to Stop on a Bike
Once you’ve got the hang of finding the biting point, it’s time to ride away, but not before we cover how to stop first.
As we covered at the start, motorcycles have a separate front and rear brake, unlike a car with one pedal for all. It’s important to know how to control both of these, the reasons why and ultimately, the safest way to come to a complete stop.
The front brake is the most powerful of the two, but not the one you’d want to use for slow-speed riding (anything under 10 or so mph) or tipping into a bend. It’s great for shedding speed quickly, but the rear is the one you want to use for slow-speed manoeuvring and riding.
Top tip: Use your front brake at higher speeds and your rear brake at lower speeds.
5. Moving Off
Now that we’re familiar with the biting point and how to safely stop a motorcycle, we can begin to find out how to actually ride it.
As before: clutch in, select first gear and get your biting point, but this time, allow the bike to move away (whilst still remaining in first gear) and ride around getting a feel for it at slow speeds.
Top tip: Stay in first gear at this stage. Keep the pressure to speed ahead away and focus on getting it right in first gear before anything else.
6. How do you shift gears? | Getting out of First
When comfortable, ride around in first gear as you’ve been doing, have some space in front of you; clutch in, shut the throttle off and click the gear lever up with your foot a bit harder than before, and then release the clutch and begin accelerating again.
Top tip: This will be a slow process to begin with, and gear changes are going to be clunky and slow, but it’s important to remember, don’t rush and allow yourself time to get used to how it all works.
Once you’ve mastered pulling away in first and changing gear to second, follow the same process for the remaining gears when you are comfortable, and it will all start to make sense, but still remain off the road at this stage and practice going back and forth, getting familiar.
7. Road Safety First | Rules of the Road
At this point, you should be comfortable with how your motorcycle works, how to safely stop it, control its gears and manage the biting point, but we need to take a look at how to keep safe on the road first before you head out and try your first ride.
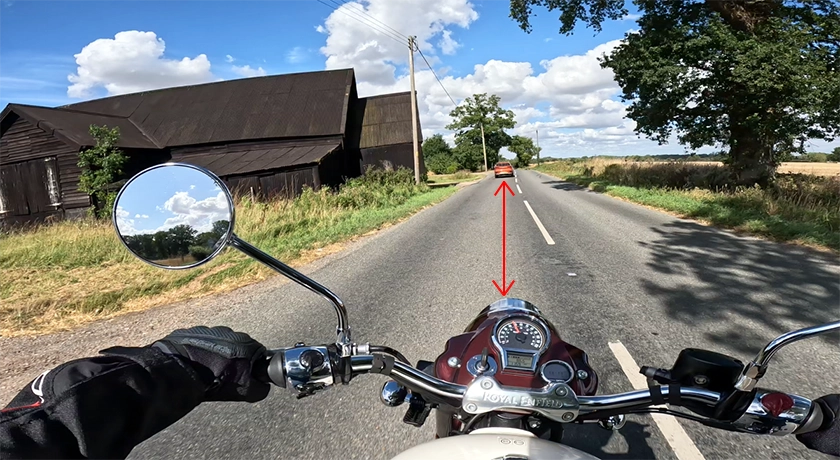
The importance of maintaining enough distance between you and the vehicle in front is vital and a key safety aspect of motorcycling. By not leaving enough, you are putting yourself at risk of not stopping in time in the event of an emergency.
It is also key to get in the habit of carrying out shoulder checks or ‘lifesavers’ regularly. Mirrors on motorcycles are never that great, so always check your blind spots by glancing over your shoulder for a brief moment to make sure it’s clear.
By riding defensively, you’re preparing yourself for the worst, and if it doesn’t happen? Great, that’s what you want, but at least if it does happen, you’re already prepared.
Making yourself visible also improves your chances of being seen, especially as a new rider. Even something as simple as a white helmet is better than full black gear if you don’t want to wear a high vis, but being seen is key.
Top tip: Keep your distance by learning the ‘2 second rule’, be seen, ride defensively and do your lifesaver checks.
8. On the Road | Riding a motorcycle
Unlike a car, turning a bike at speed is not entirely done by turning the bars, but instead leaning, applying a bit of counter steering (explained further down) and maintaining ahead vision.
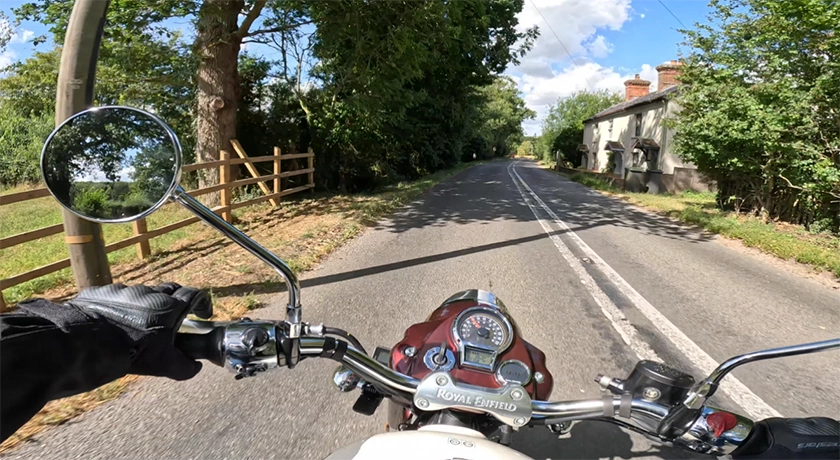
If you look where you want to go, the bike will follow. If you look at the tree, parked car or whatever may be to the side of you, you’re going to be heading straight for that. This is called target fixation and can, in some instances, be the root cause of a lot of riding accidents when you’re inexperienced, in my opinion.
Top tip: Avoid target fixation by learning to look where you want the bike to go ahead of you. Look through the bend and not at it.
9. What is countersteering?
In real-world riding, if you’re approaching a left-hand bend and want to quickly turn in, apply a gentle push forward of the left handlebar to get the bike in a left-hand lean, and don’t forget to look through the bend to avoid target fixation.
Top tip: There is one simple way you can learn. Ride along at a steady pace in a clear area with plenty of space (above walking speed for it to take effect) and gently push forward on either side of the handlebars very gently. What you will find is that pushing gently forward on the right handlebar will cause the bike to lean right and turn right, and pushing on the left will make it lean and turn left. This is the basic principle of countersteering.
10. Practice never ends | Advanced Riding Skills
Now, hopefully you should be pretty up to speed with controlling your motorcycle, changing gears, cornering, stopping and setting off at this point, but that’s not the end of the road for motorcycle riding.
Every day you ride will increase your experience, and this is only developed over time, so whilst riding is still new, take your time and don’t think you’re a GP rider straight away, but instead enjoy the process.
Advanced rider skills are something that only develops over time, but having ridden for nearly 11 years myself, I’d say I’ve picked up one or two along the way, and to finish this article up, I’ll cover a few to give you a head start.
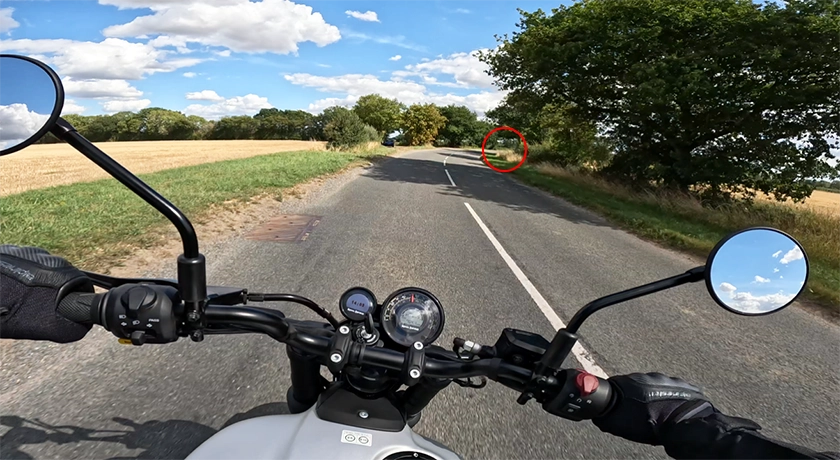
The vanishing point is something that, once learnt, can keep you a lot safer on the roads. Riding position and learning not to give in to target fixation are vital, but reading the road is equally important. As you approach a corner, see how far you can see into it.
Once your line of sight disappears, the question mark over what lies behind increases, and this is the vanishing point. It’s not just useful for predicting hazards, but it’s also key to managing speed and reducing it in case the corner suddenly tightens unexpectedly, for example. This technique allows you not to be solely reliant on road signs in the event of them not being visible or having been knocked down, putting you in control.
Night riding can also be nerve-racking for newer riders, but with a few tips, it can be made a lot easier.
Learning to spot reflections in the hedgerows when riding in the countryside is a technique I learnt when I started riding. Almost 3D scanning the entire road and surrounding landscape allows you to ride defensively and keep watch for suspicious-looking eyes of various wildlife that could take you off your bike.
I also naturally ride a little slower in the dark to allow for shorter stopping distances. Unless you have magic night vision, you’re never going to see something at the same time in the dark as you would in the day, so things tend to spring up on you, which is why I allow a bit more time in case something did happen.
It may seem simple, too, but make sure your headlight is clean! And not only this, I cannot stress enough the importance of a clean visor before setting off in the dark. Any small scratch, smudge or bug splatter is increased with oncoming headlights and can not only be disorienting but also prevent you from seeing at all in some cases.
A lot of this also applies to rain riding. Keep your visor clean, dramatically increase your stopping distances and ride even more defensively than in the dry. Try not to lean the bike over too much either, but equally, keeping it totally upright is only going to slow you down and possibly put you in a dangerous position with other traffic.
Final Top Tip: Learn the vanishing point, keep your distance in the rain, keep your headlight and visor clean and watch for reflections in the dark!
The Final Stop
I hope you’ve enjoyed this article and have taken something from it to benefit your two-wheeled career. If you’ve just got your first bike and need beginner rider insurance, head to Lexham to get your motorcycle insurance quote direct!