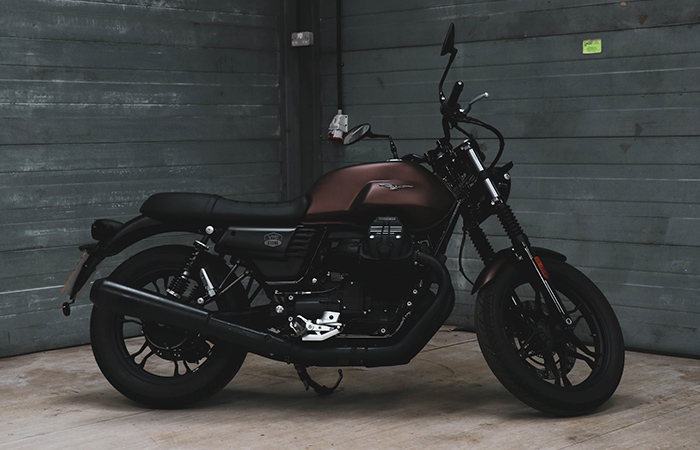
Perhaps you’ve been out on a ride recently and noticed squeaky brakes that feel a bit wooden when coming in hot to a corner, or maybe some pulsing & unfamiliar feel through the levers. Unsurprisingly, your brakes are a fundamental part of riding well and staying safe when out on the road, so let’s take 5 minutes to show them a little love.
It goes without saying that it’s vital to keep on top of the ongoing maintenance of your motorcycle or scooter – keeping your brakes in tip-top condition is incredibly important for safety & performance, and it’s easier than you think.
It’s a fairly simple process to keep your brakes in order, and chances are you already have the few tools at home/in the garage (sockets, allen keys, torque wrench, rags, and cleaners) that you need to get your brakes gleaming and performing at their best – plus prevent uneven wear or even possible damage.
Before we get started, it is worth noting that if you’re after full guidance on brake maintenance, check your manual and/or seek professional advice at your local garage.
How to Check Motorcycle Brakes
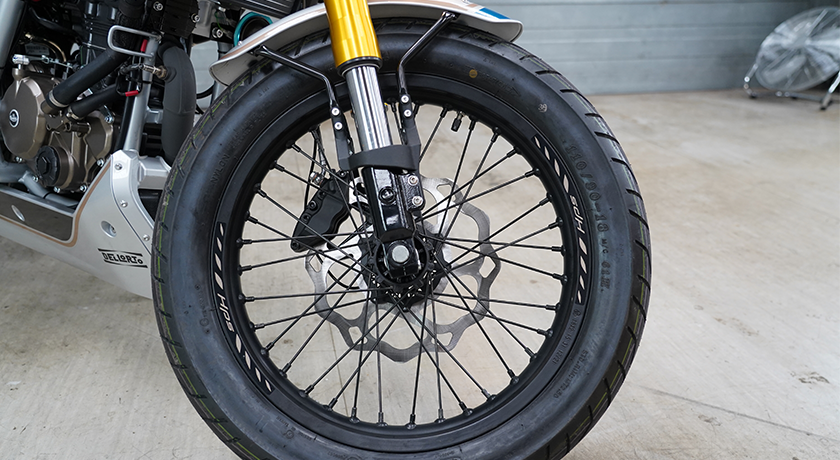
Checking if your brake pads need replacing is a simple process, with most fitted with a wear indicator groove either moulded or cut into the surface of the pad.
As the pads begin to wear down, the groove will begin to disappear – so if you see a visible groove you’re in luck, but if that groove is disappearing (or the pad itself measures 2mm or less) it’s time to replace them.
If taking the pads out of the caliper to give them a once over, it’s worth noting which pad was on which side if they go back on, and take a look for any uneven wear (no wobbly discs!).
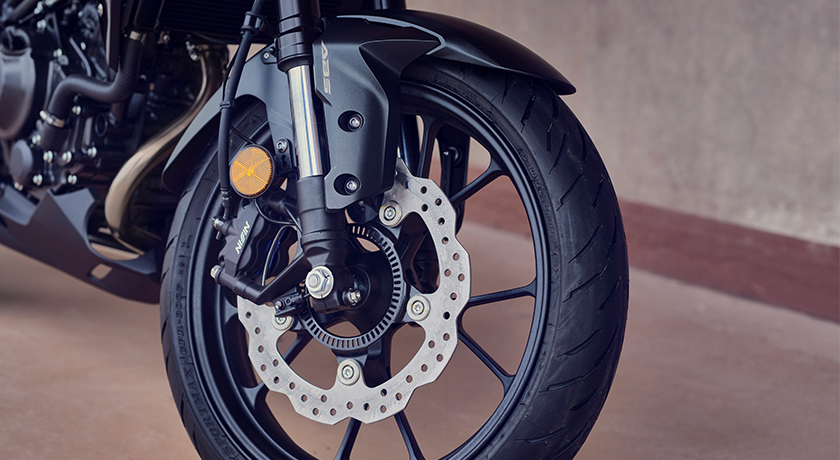
How to Perform Brake Caliper Maintenance
Keeping your callipers clean is one of the most important things you can do for your bike - ideally, you should be cleaning and greasing the pistons regularly to prevent them seizing inside the calliper.
First, unbolt the calliper and slide it off the disc, WITHOUT pushing the pads back into the calliper. This allows you to remove the pads and get to the pistons to clean them without causing any damage – also check the pads are in good condition.
Once removed, you can then begin to clean the exposed piston and seal using brake cleaner, then apply some rubber grease to the same area - take care to not get it everywhere as you don’t want residue getting into your pads.
Once everything is all clean and dry, you can then place the pads back on the bike, ensuring they are in the same position as they were when they came off, as well as pop any springs/pins back in after cleaning them too.
It might take you around an hour, but it’s so worth the time!
How to Maintain Your Brake Discs
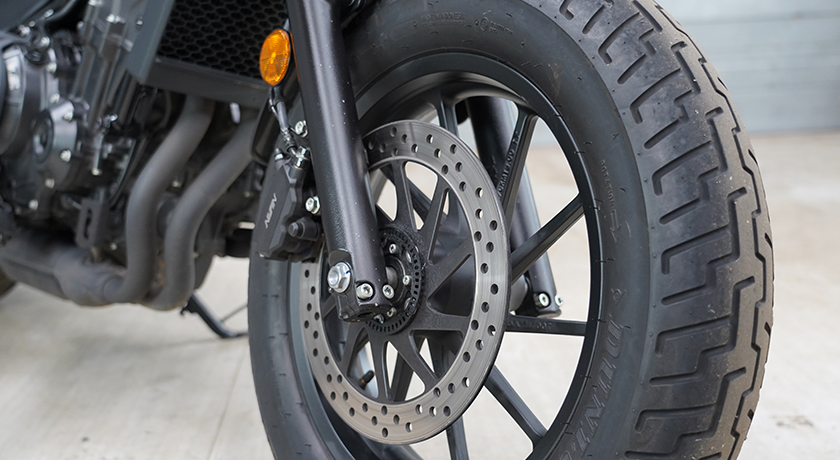
Show some love to the discs, too. Prop the wheel up on a stand if you can, or work on the exposed disc one bit at a time. Simply run a stiff nylon brush or scouring pad around all of the contact areas of the disc, getting rid of the road grit and detritus, plus scuzz from the caliper (as they get hot from use, they’ll leave some deposits on the disc).
Then, get some brake cleaner and a clean rag (or blue paper) to get rid of the last bits of dirt. Nice and easy – but steady on when next riding away, they may need a few miles to bed in properly.
How Long do Brake Pads last?
There is no correct set-in-stone answer to how long your brake pads will last, but the answer tends to be around 20,000 miles. Though this is heavily dependent on your use. You can also check the wear indicator on the pad itself, it wants to be at least more than 1 mm.
If you’re out on track they'll last seriously lower than this, whilst gentle pootling around town with limited strenuous use of the brakes will see greater intervals between required pad changes.
You’ll also need to replace the pads more often if there is uneven wear or dragging from the calliper, another reason to keep on top of the maintenance!
Reasons why your brake pads are worn:

General Wear and Tear
Perhaps an obvious one, but naturally after a while brake pads will need replacing as they are a consumable product.
Speed
More speed = increased wear. Those who mostly ride at slower speeds for a smaller amount of time are going to have a lot less wear on their brakes in comparison to those who are braking at higher speeds.
You may also find that your front brake wears a lot faster than your rear brake due to the weight transfer when braking - causing faster wear.
Heat and Friction
Over time, the continued heat and friction from braking can lead to gradual brake wear. Excessive heat in the braking system can lead to cracked pads, so that's why it is always advisable that you check your bike over regularly to see if there are any issues.
Caliper Faliure
If you’re finding your brake pads are wearing unevenly, your bike may be undergoing calliper failure. This can happen when the seal from the caliper eventually loses the ability to pull back, causing the pads to put constant pressure against the brake rotor.
A lot of rust or debris in your brake pistons
If you have a lot of debris or rust in your pistons, it can cause your calipers to become sticky. When the calipers become sticky this means that your pistons won't slide correctly, allowing the brake pads to make uneven contact with the rotors, leading to uneven brake pad wear.
How to make your brake pads last longer
The best way to maintain your brake pads for longer is to adopt better riding habits, such as:
- Follow speed limits and maintain safe following distances.
- Keeping an eye on traffic and anticipating necessary stops/braking.
- Regularly servicing your bike and changing brake fluid regularly
- Remove any unnecessary weight from your bike.
- Keep your speeds low in heavy traffic
- Always replace your calipers in pairs - failure to do so can result in imbalance
How to service drum brakes on a motorcycle
While the brake maintenance you can do at home is restricted, there are still a few tasks you can carry out such as replacing your brake shoes, inspecting for any wear and tear, and general cleaning.
This process should be fairly simple:
Step 1:
First things first, you will need to check to see how worn the brake shoes really are. We can do this by checking the indicators on the actuating arm and then on the back plate.
Step 2:
Both of these have an arrow that will move when you push the lever in. If these arrows line up, this will be a pretty good sign that your brake shoes are worn out and will need replacing.
Step 3:
When it comes to the back brake, typically these do not have wear indicators, so you will have to use a little bit of common sense when deciding if they need replacing. A good example of telling that your rear shoe has worn is when the adjustment has all been taken up.
Step 4:
When replacing your brake shoes it will require wheel removal. You can do this by loosening the wingnut from the adjusting rod. Once the nut has been removed completely you can detach the rod by pressing down on the rear brake pedal and moving it up and out of the way (when removing the pieces, it would be in good practice to store them in a place you won’t lose them).
Step 5:
Now you can begin to remove the wheel. It is worth noting that every motorbike will be a little bit different, however regardless of which bike you are going to have something that is holding the braking plate into place. Whatever this may be, it is best to follow the instructions in your owner's manual on how to remove this correctly.
Step 6:
After the wheel has been removed you can then remove the backing plate and separate the brake shoes. To detach the shoe, slowly wiggle one side up to release all of the spring tension and then you can pull the rest of the shoe off. Once the shoes are off, you can start giving the backing plate a good clean using a good-quality brake cleaner.
Step 7:
You will then need to prep your new brake shoes and install the springs before attaching them to the backing plate by sliding them down until they fit into place. Once in place, your shoes are ready to be reattached to your wheel.
Step 8:
The next thing you will want to do is clean the drum. You can do this by taking a clean cloth making sure to take it easy and not damage anything - now you can continue onto inspection.
Step 9:
Run your fingers around the inside of the drum, checking for any big grooves where the shoe fits. If there is, this will mean you will need to replace your drum. If not, you are free to reuse the existing drum.
Step 10:
Now you can put everything back together and reattach the wheel and the brake rod, making sure to put all of the bolts and nuts into their original positions and everything lines up correctly.
Step 11:
Lastly, you will need to adjust the chain and rear brake using the wingnut. This will need to be done by tightening the wingnut until you feel drag on the wheel, once you feel this you can then loosen the nut with three clicks - this should give you a good amount of clearance.
Step 12:
Now onto the front brake:
Whilst the steps are almost identical to the rear brake, the only difference is that some bikes may have a speedo cable - so you will need to make sure that this is removed before you continue onto the next step.
Bleeding Your Motorbike Brakes
It is important to note that when servicing your brakes and bleeding them, you will need to take special measures in order to avoid skin or eye contact. We would recommend wearing rubber gloves, safety glasses, and long-sleeved tops/jumpers.
Another rather annoying thing about brake fluid is that it can strip paint or cloud the plastic on your bike if it comes in contact with it. One solution would be to place as many towels or spare rags around your bike to limit any potential damage.
What will you need to bleed your brakes?
You will need the following:
- Wrench and/or spanner
- Brake bleeding kit (hose, rubber fitting, small container)
- Fluid overflow container
- Brake Fluid (500ml should be enough)
How often should you bleed motorcycle brakes?
Believe it or not, the process of bleeding your brakes is not very hard, nor does it take too much time. Ideally, you should be trying to bleed your brakes once every two years, or when the brake fluid turns from clear to a black/brown coloured liquid.
Signs your brakes need bleeding
There are a few ‘warning’ signs that you need to bleed your brakes. Look out for:
- Reduced braking power
- Sponginess in the lever
- Inconsistent braking
What you will need to bleed your brakes:
You will need the following:
- Wrench and/or spanner
- Brake bleeding kit (hose, rubber fitting, small container)
- Fluid overflow container
- Brake Fluid (500ml should be enough)
How to bleed motorcycle brakes
Step 1:
First things first, it is important to read over your owner's manual. In your manual, you will find the torque specs, detailed procedures, and fluid information - all important information to the task at hand.
Step 2:
Start preparing to bleed your brakes by positioning the front or rear cylinder and reservoir (depending on which brakes you're working on) as close to flat as possible.
Step 3:
Unscrew your reservoir cover and cap screws, using the correct screwdriver, and remove the diaphragm.
Step 4:
Next to the caliper, remove any necessary covers and guards so the bleeder valve is visible, and insert a piece of tubing that fits over the valve and is long enough to reach your container.
Step 5:
Now everything is plumed up, you can begin the bleeding process by squeezing the brake lever or pushing the pedal down, and then begin to open the bleed valve by turning it halfway. Air and brake fluid should begin to exit the valve.
Step 6:
After this, close the bleed valve and slowly release the brake lever or pedal, allowing it to remain at its original position for a few seconds, and repeat the process a few times while keeping your eye on the fluid levels in the reservoir.
Step 7:
During this process, if all of the fluid in the reservoir is consumed and air gets sucked in, it will need to be restarted from the beginning. Add fresh brake fluid to the reservoir throughout the bleeding process to ensure no air gets sucked in.
Step 8:
Keep repeating this process until the liquid being bled consists of just brake fluid. Once the process is done you should feel a change in the brake lever or pedal.
Step 9:
After finishing bleeding your brakes, you will need to ensure your fluid levels in the reservoir reach the upper level of the fill line. You can then install the diaphragm, cover, and cap back onto your bike.
Step 10:
Once you've tightened everything back up you can then test your bike by rolling the bike forward and backward to see how responsive the brakes are - you can then proceed onto a test ride.
Motorcycle Brake Fluid Tips
How to check fluid levels in your bike
Place your motorcycle in an upright position on a firm, level surface using either the centre stand on your motorbike or a paddock stand (if you have one).
For the front brake:
You will need to check that the brake fluid reservoir is lying flat and the fluid level is above the lower-level mark.
For the rear brake:
Similar to the front brake, you will need to check that the brake fluid reservoir is lying flat and that the fluid level is between the upper and lower level marks.
To identify if you have a leak your best bet is to refill your brake reservoirs and check every time after riding to see if the levels are going down dramatically. If this is the case it could mean that you do in fact have a leak and this will need fixing by a professional.
Ready To Ride
So there you have it, here is our handy go-to guide on everything you need to know about motorcycle brakes!
We would like to remind you that we here at Lexham are not mechanics, and should any bike owners out there need any expert advice, please seek it from professionals first. Always make sure you have the correct knowledge, tools and confidence before carrying out maintenance.
Head back to our main blog page to check out the latest reviews, top 10s, and motorcycle & scooter features.
Last but not least, if you do need insurance on your very own motorbike - make sure to get a motorcycle insurance quote direct with Lexham!